SHOCKING Electrical Leak That Kills: Replace Your Light Switch TODAY!
Have you ever felt a slight tingle when flipping a light switch? That momentary shock might seem harmless, but it could be a warning sign of a potentially deadly electrical fault lurking in your walls. Every year, hundreds of electrical accidents occur in homes due to faulty switches and outlets, resulting in injuries, fires, and even fatalities. The good news? This common household hazard is entirely preventable with a simple DIY fix that takes less than an hour.
Understanding the Danger: Static vs. Electrical Faults
Getting shocked by your light switch can be terrifying, but not all shocks are created equal. Learning the difference between harmless static electricity and dangerous electrical faults is crucial for your safety.
Static electricity occurs when your body builds up an electrical charge, often from walking across carpet. You'll feel a quick zap when touching metal, but this is typically harmless and only happens in dry conditions. A dangerous electrical fault, however, involves current leaking from your home's wiring through the switch to your hand. This type of shock indicates a serious problem that requires immediate attention.
- Montrose Coffee Nightmare Black Holes Dark Secret Leaked You Must See This
- The Disturbing Truth Behind Youre Still The One Shania Twains Leaked Affair Revealed
- Hooters Fresh Meadows Queens Scandal Leaked Videos Reveal Secret Orgies
Warning signs of electrical faults include:
- Consistent tingling when touching switches
- Switches that feel warm to the touch
- Flickering lights when using the switch
- Burning smells near electrical fixtures
- Switches that make crackling sounds
If you experience any of these symptoms, it's time to take action. The electrical current flowing through a faulty switch can cause serious injury or even death, particularly for children and elderly individuals who may have more sensitive reactions to electrical current.
The DIY Solution: Replacing Your Light Switch
Does your light switch feel loose when you flip it on and off, or has it stopped working entirely? Then it may be time to replace it with a new light switch. The good news is replacing a light switch is an easy DIY project you can finish in under an hour. No need to call an expensive electrician or wait for someone else to fix it.
- Shocking Weighted Vest Leak Womens Nude Transformations Are Going Viral
- Exclusive Sir Francis Drake Mayors Leaked Sex Tape Rocks The City
- Ice Spices Body Transformation Exposed The Leaked Diet Plan That Changed Everything
Our comprehensive tutorial provides all the tips and tools you'll need to tackle this common household electrical task with confidence. With basic tools and a little know-how, you can eliminate this safety hazard and restore proper function to your lighting.
Benefits of replacing your faulty switch:
- Eliminates shock hazard
- Restores proper switch function
- Prevents potential electrical fires
- Improves home safety
- Saves money on electrician fees
- Gives you confidence in your DIY skills
Essential Tools for Switch Replacement
Having the right tools at your disposal is key to successfully replacing a light switch or outlet. Before starting your project, gather these essential items:
- Flathead and Phillips screwdrivers
- Voltage tester or multimeter
- Wire strippers
- Needle-nose pliers
- Electrical tape
- New light switch (matching your old one's specifications)
- Wire connectors (if needed)
- Flashlight or headlamp
- Safety glasses
- Non-contact voltage detector
Safety first: Always turn off power at the circuit breaker before beginning any electrical work. Test the switch with a voltage tester to confirm power is off before touching any wires.
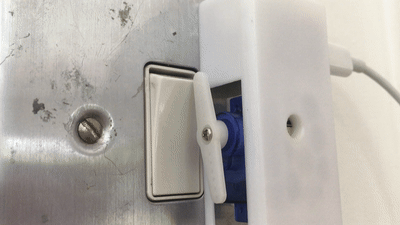
Step-by-Step Switch Replacement Process
Frustrated by a faulty wall switch? Learn how to safely and quickly replace a light switch with just a few steps for better convenience and home safety.
Step 1: Prepare Your Workspace
- Turn off power to the switch at your circuit breaker
- Remove the wall plate cover
- Use a voltage tester to verify no power is present
- Clear the area around the switch
Step 2: Remove the Old Switch
- Unscrew the switch from the electrical box
- Carefully pull the switch out, exposing the wires
- Note which wires connect to which terminals
- Take a photo for reference if needed
Step 3: Disconnect and Prepare Wires
- Loosen terminal screws to remove wires
- Check wire condition; replace if damaged
- Strip ½ inch of insulation if necessary
- Ensure wires are straight and untangled
Step 4: Install the New Switch
- Connect ground wire to green terminal
- Attach hot wires to brass terminals
- Connect neutral wires if present
- Tighten all connections securely
Step 5: Final Steps
- Gently push switch back into box
- Secure with mounting screws
- Replace wall plate
- Turn power back on at breaker
- Test switch operation
Safety Considerations and Best Practices
Includes photographs and information for safely working with electricity. While replacing a light switch is a straightforward DIY project, electrical work always carries risks. Follow these safety guidelines to protect yourself and your home:
Critical safety tips:
- Never work on live circuits
- Use proper tools designed for electrical work
- Wear rubber-soled shoes
- Keep one hand in your pocket when possible to avoid creating a circuit through your body
- If you smell burning or see sparks, stop immediately and call a professional
- Don't force connections; if something doesn't fit, investigate why
When to call a professional:
- If you're unsure about any step
- If the wiring appears damaged or outdated
- If your home has aluminum wiring (common in homes built before 1972)
- If the switch is part of a complex system like a three-way switch
- If you discover any signs of water damage near the switch
Understanding Your Home's Electrical System
While working on your switch, you might wonder about your home's overall electrical health. Understanding basic electrical concepts can help you identify potential problems before they become dangerous.
Common electrical issues in older homes:
- Outdated wiring that can't handle modern electrical loads
- Missing or inadequate grounding
- Overloaded circuits
- Deteriorating insulation on wires
- Improper DIY modifications by previous owners
If your home is more than 40 years old, consider having a professional electrician perform a thorough inspection. They can identify potential hazards and recommend upgrades to bring your electrical system up to current safety standards.
The Cost of Inaction
Ignoring a faulty light switch might seem like the easy option, but the potential consequences far outweigh the minor inconvenience of replacement. Electrical fires account for approximately 51,000 home fires annually in the United States, resulting in nearly 500 deaths and over 1,400 injuries. Many of these incidents stem from seemingly minor electrical issues that homeowners chose to ignore.
Financial implications of electrical problems:
- Average cost of home fire damage: $25,000+
- Medical treatment for electrical burns: $10,000-$50,000+
- Insurance premium increases after claims
- Decreased home value due to electrical issues
By investing an hour of your time and approximately $5-$15 for a new switch, you're protecting your family and your finances from potentially devastating consequences.
Empowering Yourself Through DIY
Taking on electrical projects like switch replacement can be empowering. Not only do you eliminate safety hazards, but you also gain valuable skills and confidence in maintaining your home. Many homeowners find that successfully completing small electrical projects encourages them to tackle other home improvement tasks.
Additional DIY electrical projects to consider:
- Replacing outlet covers and switches for a fresh look
- Installing smart switches for home automation
- Adding USB charging outlets in convenient locations
- Replacing old, two-prong outlets with grounded three-prong versions
Remember that while DIY projects can save money and build skills, your safety should always come first. Never hesitate to call a professional if you're unsure about any aspect of electrical work.
Conclusion
That shocking sensation when touching a light switch isn't just annoying—it's a warning sign that demands immediate attention. By replacing faulty switches yourself, you're taking a crucial step toward protecting your home and loved ones from electrical hazards. With the right tools, knowledge, and safety precautions, this simple DIY project can be completed in under an hour, saving you money and potentially preventing a tragedy.
Don't wait for a small electrical issue to become a major disaster. Take action today to replace that faulty switch and enjoy the peace of mind that comes with a safer home. Remember, when it comes to electrical safety, an ounce of prevention is worth a pound of cure. Your future self—and your family—will thank you for making this important home improvement today.