YOU WON'T BELIEVE HOW TESTING AN ALTERNATOR CAUSED THIS LEAK!
Have you ever wondered what could possibly go wrong when testing your car's alternator? Most people think it's a straightforward process, but one simple mistake can lead to catastrophic consequences. Imagine thinking you're diagnosing a charging issue, only to discover you've created a completely new problem that leaves you stranded and facing expensive repairs. This isn't just a hypothetical scenario—it's happening to drivers every day who don't understand the proper testing procedures for their vehicle's charging system.
Understanding Your Vehicle's Charging System
The alternator in your car is designed to generate voltage at prescribed amperage which is designated by a voltage regulator or vehicle computer. This electrical energy feeds the car's electrical system and to recharge the battery which keeps the vehicle operating properly. Without a properly functioning alternator, your car would quickly drain the battery and leave you unable to start or drive.
Modern vehicles rely heavily on their charging systems. The alternator doesn't just keep your battery charged—it powers everything from your headlights to your infotainment system while the engine is running. When you turn the key, the battery provides the initial burst of energy to start the engine, but once running, the alternator takes over as the primary power source.
- Chers Secret Lover Leaked Shocking Dating Scandal Exposed
- Nude Truth Revealed Why Premium Outlet Tucson Az Is The Most Controversial Mall In America
- Porn Industrys Secret War On Catholicism Leaked Stats Show How Many Are Left
Common Signs of Alternator Problems
Does your car not start, do you have dim headlights or interior lights, do you notice unusual electrical behavior? These symptoms often point to charging system issues rather than battery problems. Many "dead battery" or "no start" situations are actually caused by charging system failure, not the battery itself.
The symptoms can be subtle at first. You might notice your headlights dimming when you're idling at a stoplight, or your dashboard lights might flicker unexpectedly. Some drivers report that their power windows move more slowly than usual, or that their radio resets itself randomly. These seemingly unrelated issues often share a common cause: an alternator that isn't providing consistent voltage.
The Dangerous Testing Mistake Most People Make
If you're tempted to test an alternator by disconnecting the negative battery cable, don't do it. This method, which was once common practice on older vehicles, can cause severe damage to modern cars. The safe way to test an alternator is to use a voltmeter instead to conduct a simple, safe test.
- Sex Lies And Data Noise The Viral Scandal Exposing Signal To Noise Ratio
- One Day Well All Swear We Never Supported This The Shocking Leak
- You Wont Believe Ice Spices Weight Loss Method Its A Total Scandal
Testing an alternator by disconnecting the battery cable while the engine is running is the single best way to destroy every computer in your vehicle. Modern cars contain multiple computer modules that control everything from engine timing to transmission shifting, and these sensitive electronic components can be instantly damaged by voltage spikes that occur when the battery is disconnected during operation.
How to Test an Alternator with a Multimeter
Learn how to test an alternator with a multimeter safely and accurately. This method provides reliable results without risking damage to your vehicle's electrical system. Start by ensuring your engine is off and your battery is fully charged. Set your digital multimeter to measure DC voltage, typically 20 volts or higher.
Connect the red probe to the positive battery terminal and the black probe to the negative terminal. With the engine off, you should see a reading around 12.6 volts, which indicates a fully charged battery. Now start the engine and observe the voltage reading. It should increase to between 13.5 and 14.5 volts, indicating that the alternator is charging the battery properly.
Step-by-Step Testing Procedure
Learn how to test your alternator with a multimeter to diagnose issues in the starting system to be sure that the alternator is the problem. With the engine running at a steady idle, check the voltage at the battery terminals again. The reading should be higher than when the engine was off, typically in the 13.5 to 14.5-volt range.
If the voltage is lower than 13.5 volts, your alternator may not be charging properly. If it's higher than 14.5 volts, it could be overcharging, which is equally problematic. Both conditions can damage your battery and other electrical components. You can also test the alternator's output under load by turning on your headlights, heater fan, and other electrical accessories while monitoring the voltage.
Understanding Voltage Drop Testing
Voltage drops on the positive side of the charging circuit can cause undercharging, even when the alternator itself is functioning correctly. This is why comprehensive testing involves more than just checking output voltage. Use your multimeter to check for voltage drops across connections, cables, and the alternator output terminal.
Place one probe on the alternator's output terminal and the other on the positive battery terminal while the engine is running. You should see less than 0.5 volts difference. Any higher reading indicates resistance in the charging circuit that needs to be addressed. Similarly, check the ground side of the circuit by measuring between the negative battery terminal and the engine block.
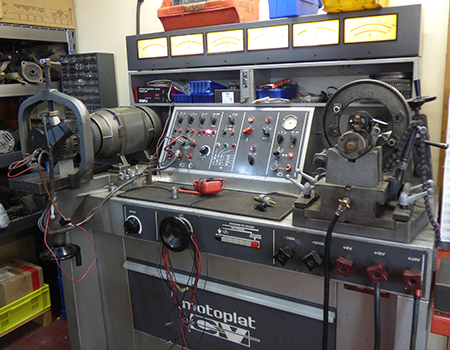
Professional Testing Methods
Testing an alternator properly is one of the most useful automotive diagnostic skills. While a basic multimeter test can identify obvious problems, professional mechanics use more sophisticated methods. Many auto parts stores offer free alternator testing, and this service can save you time and prevent misdiagnosis.
Another approach for reducing comebacks and unnecessary warranty returns is to ask your parts supplier to bench test your customer's old alternator, and to bench test the new alternator before you install it. Bench testing applies a controlled load to the alternator and measures its performance under various conditions, providing a more accurate assessment than simple voltage checks.
Identifying Battery Drain Issues
Identify if your alternator is draining your battery with a few simple tests and observations. While alternators are designed to charge batteries, a failing unit can actually cause battery drain through various mechanisms. A diode failure inside the alternator can create a parasitic draw that slowly depletes the battery even when the car is off.
The alternator plays a crucial role in keeping your car's battery charged and powering the electrical systems while the engine is running. However, when the alternator begins to malfunction, it can drain the battery, leading to poor performance or even a dead battery. This seems counterintuitive—how can a charging device drain a battery? The answer lies in the complex electronics inside modern alternators.
Visual Inspection and Diagnosis
Here you will find tips and remedies for certain symptoms and causes of failure of a defective alternator. Before diving into electrical testing, conduct a thorough visual inspection. Look for obvious signs of trouble such as loose or corroded connections, cracked belts, or physical damage to the alternator casing.
We also show you on this page how to check the charging system such as, for example, carrying out a visual inspection before diagnosis, the checking of batteries, alternator check and testing with the diagnostic unit. Check the serpentine belt for proper tension and signs of wear. A slipping belt can cause intermittent charging problems that are difficult to diagnose without careful observation.
When to Replace Your Alternator
If you have a newer battery but your car won't start, you may have a bad alternator. Many people replace batteries multiple times, not realizing that the real problem is their charging system. A good battery should last three to five years, so if you're replacing it more frequently, investigate the alternator and charging circuit.
Starting & charging trouble can be hard to diagnose. That's why we put together this guide to show you the signs of a bad alternator. Beyond the obvious symptoms, listen for unusual noises coming from the alternator area. A failing bearing can cause a whining or grinding noise that increases with engine speed. Also, check for warning lights on your dashboard, particularly the battery or charging system indicator.
Preventing Charging System Problems
Regular maintenance can prevent many alternator failures. Keep your battery terminals clean and tight, as poor connections force the alternator to work harder. Replace serpentine belts according to your manufacturer's recommendations, as worn belts can slip and reduce charging efficiency.
Whether you're a seasoned gearhead or a new car owner, understanding your vehicle's charging system is essential for preventing breakdowns. Modern vehicles are increasingly dependent on reliable electrical power, and charging system failures can leave you stranded or cause expensive damage to electronic components.
Conclusion
Testing your alternator doesn't have to be complicated or dangerous, but it does require understanding the proper procedures and avoiding common mistakes. The old method of disconnecting the battery while the engine runs might have worked on classic cars, but it's a recipe for disaster with modern vehicles. Instead, use a multimeter to check charging voltage, test for voltage drops in the charging circuit, and consider professional bench testing for accurate diagnosis.
Remember that charging system problems often masquerade as battery issues, so don't rush to replace your battery without checking the alternator first. With the right knowledge and testing methods, you can identify problems early, prevent costly damage, and keep your vehicle's electrical system running reliably for years to come.